How to Build a Heavy Duty Barn Door
How to Make a DIY Rustic Barn Door and Hardware
![]() Time
Time
Multiple Days
![]() Complexity
Complexity
Intermediate
![]() Cost
Cost
$251-500
Introduction
If you've investigated rustic "barn" doors, you've probably gotten sticker shock. Here's how to save your money by taking the "DIY" approach to building a barn door.
Tools Required
Materials Required
- 1-1/2-in. wrought-head nails (40)
- 1x6 x 8 ft. No. 2 pine boards (12)
- Barn door hardware kit
- Brush or roller for poly
- Dark stain (1 qt.)
- Gray stain (1 qt.)
- Knot cup brush for grinder
- Light gold stain (2 qts.)
- Polyurethane (1 qt.)
Here's How to Make Your Own Barn Wood:
ⓘ
Project step-by-step (16)
Step 1
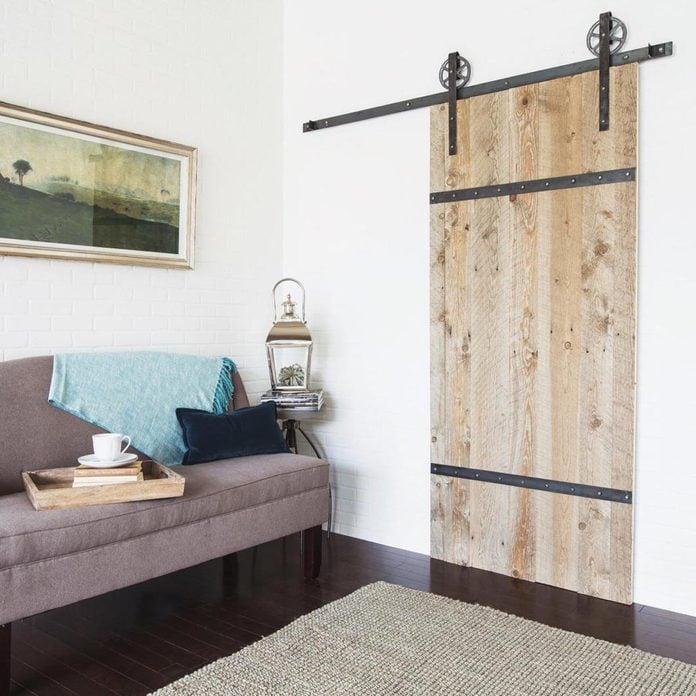
Know Your Options for Barn Door Hardware
Before you start shopping for barn door hardware, take a careful look at the area where you would like to install the barn door and figure out what door setup works best.
- If you want to cover the opening with one door, you'll need an area on one side of the opening that's wide enough for the door.
- Pro tip: Make sure there aren't any obstructions like light switches, sconce lights or heat registers that would be covered by or interfere with the door. If there's not enough wall space on one side of the opening, you can install a pair of doors that slide to opposite sides or buy special bypass hardware that allows the doors to stack.
- Barn Door Hardware Sources:
- artisanhardware.com
- realslidinghardware.com
- barndoorshardware.com
- rusticahardware.com
Step 2
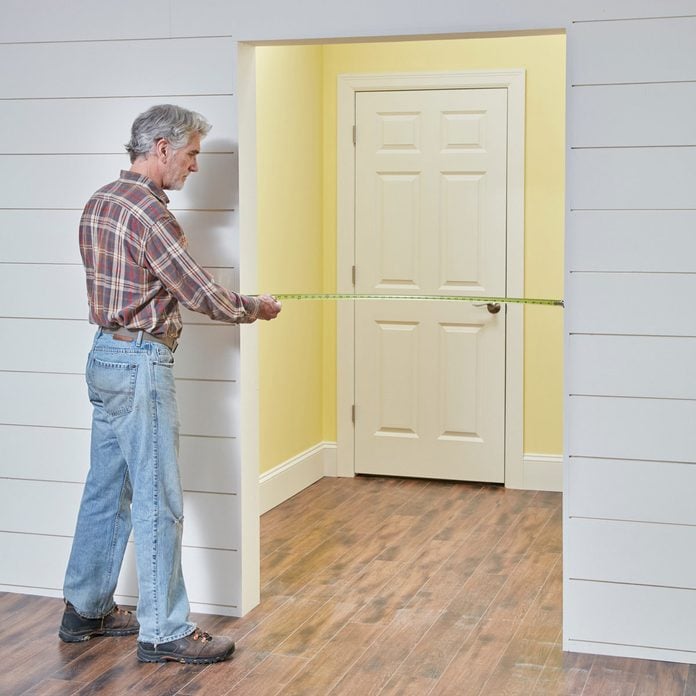
Measure the Opening
- To determine the door width, add at least two inches to the width of the opening or to the outside dimensions of the door trim.
- Pro tip: Sliding doors should extend at least an inch beyond the sides of the opening that don't have trim or an inch beyond the moldings of openings with trim. You can add more overlap for extra privacy.
- Choose your barn door hardware before determining the door height. Check the measuring instructions or ask the manufacturer for help arriving at the door height. In most cases, measuring to the top of an opening with no trim, or to the top of the trim, and subtract 1/2-in. from your measurement will give you the minimum door height required.
- Pro tip: Make sure you allow enough clearance above the opening to lift the door onto the track. This distance varies depending on your hardware, so again, check with the manufacturer.
Sign Up For Our Newsletter
Complete DIY projects like a pro! Sign up for our newsletter!
Do It Right, Do It Yourself!
![]()
Step 3
Three Ways to Support the Tracks
To support a door, the track needs to be solidly mounted to wall framing. There are three options.
- Install continuous wood backing between the wall studs at the track height. This allows you the freedom to install track-mounting screws at any location.
- Pro tip: This method isn't practical in a room that's finished because you would have to remove the drywall or plaster to install the blocking
- Mount a header board to the wall surface (as seen in the photo above), making sure it's securely screwed to the studs, and screw the track to the header board.
- Pro tip: One manufacturer recommends a maximum door weight of 75 lbs. if you're using this method because the support screws will only be engaged in 3/4-in.-thick wood.
- The third option is to bolt the track directly to the studs. You have to do two things if you choose this method.
- First, make sure to order an undrilled track, as you'll need to drill holes yourself at the stud locations.
- Second, ask the supplier to recommend hardware to avoid crushing the drywall. Most suppliers have crush plates or something similar to solve the problem.

Step 4
Get the Right Spacers and Floor Guides
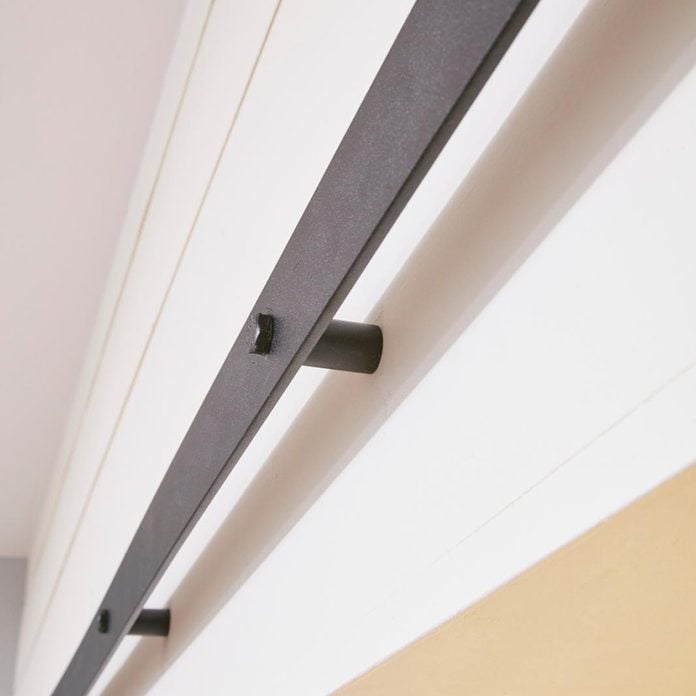
Some sort of spacers or stand-offs that hold the track away from the wall, allowing the door to slide freely, will be included in the track mounting DIY barn door hardware.
- Some companies supply spacers in different lengths, while others supply adjustable-length spacers. The length of the spacers is determined by your track mounting method, whether there is trim around the door or at the floor that you must clear, and the thickness of your door.
- Pro tip: Be sure to double-check with the supplier before placing your order to make sure you're getting the correct length spacers for your situation.
Step 5
Roller Guide
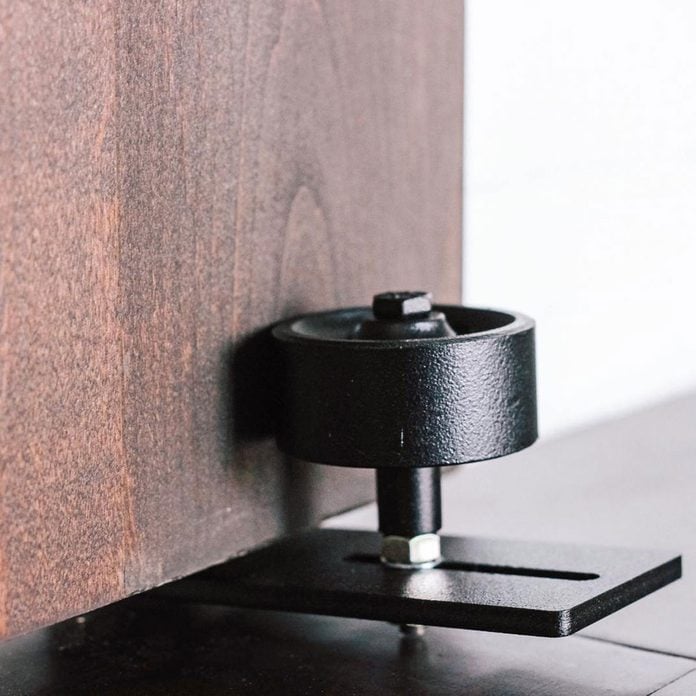
You'll need a guide at the floor to prevent the bottom of the door from swinging.
- The simplest guide is an L-shaped metal bracket that mounts to the floor and fits into a groove cut in the bottom of the door. If your barn door doesn't have a groove in it, there are roller guides and adjustable roller guides that will work. Choose the guide that works best for your door.
Step 6
Make Shiplap Boards
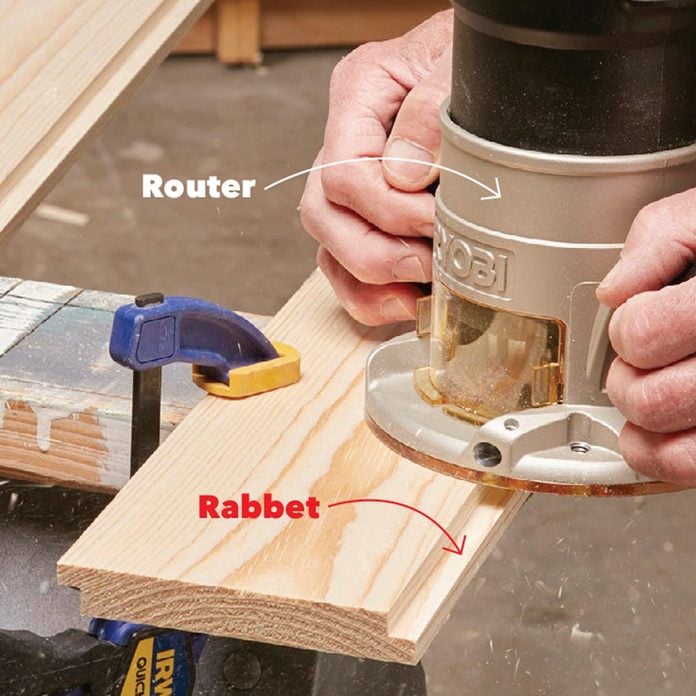
We used inexpensive 1x6 No. 2 pine boards, cut rabbets on the edges to make shiplap boards, and distressed and stained them to resemble old barn wood. When you choose boards, don't worry about knots, scratches or gouges. But try to pick boards that are straight and not cupped or warped.
- Divide the width of the door by the board width to see how many boards you will need. Then adjust the board width until they are all equal.
- Pro tip: When you're doing the math, remember to account for the shiplap edges.
- For our 4-ft.-wide door, we cut each board five inches wide. Yours may be different. Cut the boards to the right width and cut rabbets on two edges of all but two boards.
- Cut one rabbet on two boards that will be used on the outside edges.
- Pro tip: We used a 3/8-in. rabbeting bit to cut the rabbets. A table saw with a dado blade will also work.
- We also cut the boards to the right length before distressing them so we could make the ends look aged. At the same time, cut the two horizontal rails and the two 3-in.-wide blocks that go under the hangers. Make the horizontal rails two inches shorter than your door width.
Step 7
Distress the Boards with a Grinder
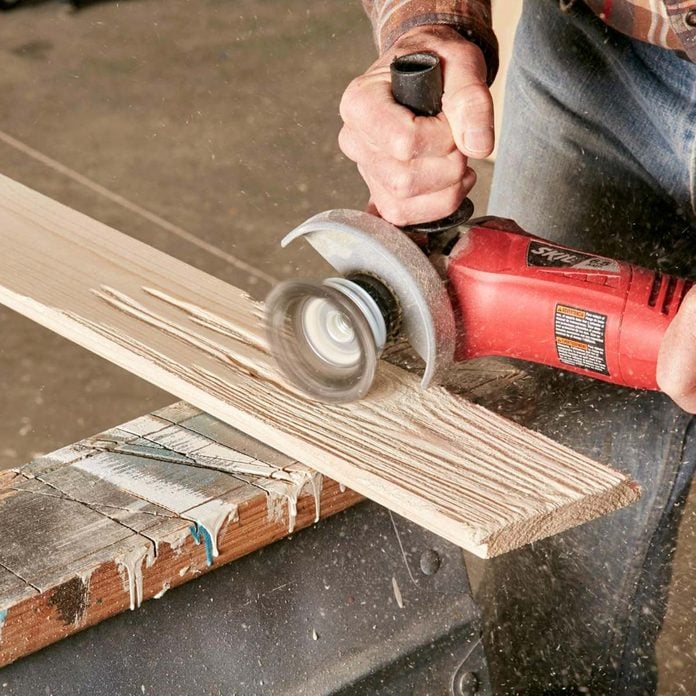
Use a brush knot cup mounted in an angle grinder to abrade the softwood and expose the grain. This gives the wood a weathered look.
- Start by nailing the board to the sawhorses with finish nails to hold it in place. The nail holes will add to the rustic appearance.
- Tip the grinder so the wheel is on edge and parallel to the grain to wear away the soft wood.
- Pro tip: Pieces of wire from the cup can break off and cause serious injury if you're not protected, and there's a lot of dust. Make sure to wear safety goggles, hearing protection and a good-quality dust mask.
- Use the wire wheel on the edges and ends of the board to create an uneven, worn look. You can also hold the wheel flat on the surface and move it in arcs across the wood to resemble saw marks. Don't worry; you can't go wrong here. Wearing away any amount of wood will look great.
Step 8
Make Wormholes
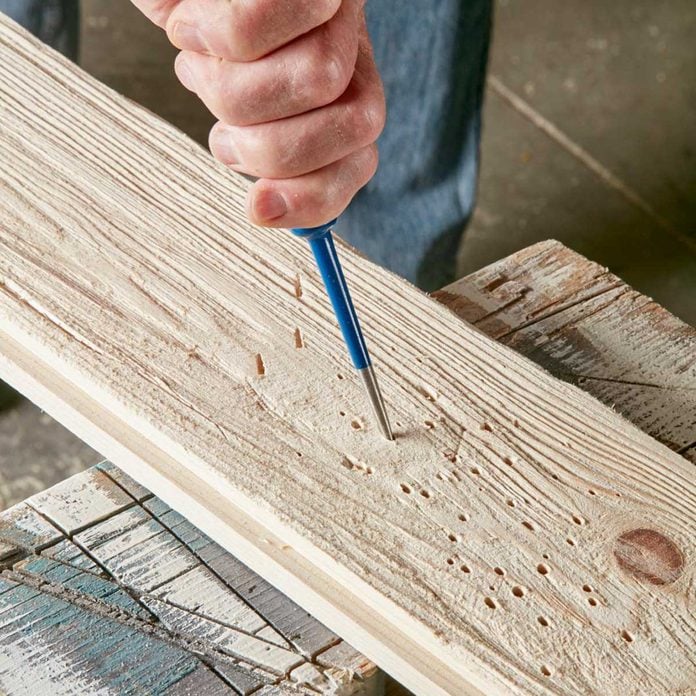
If you want to take your distressing to the next level, use an awl to create "wormholes."
- Drag a screwdriver or other sharp object along the grain to create a fake crack. Use your hammer claw or any other tool or heavy object to create dents and gouges.
- Pro tip: You don't have to put holes in every board. Some variety will add authenticity.
 .
.
Step 9
Apply a Base Coat of Stain
- To achieve the look you see here, start by applying a base coat of light gold stain to the boards. Wipe off excess stain with a rag.
- Pro tip: We applied the stain with a mini roller to speed up the process.

Step 10
Add Dark Stain
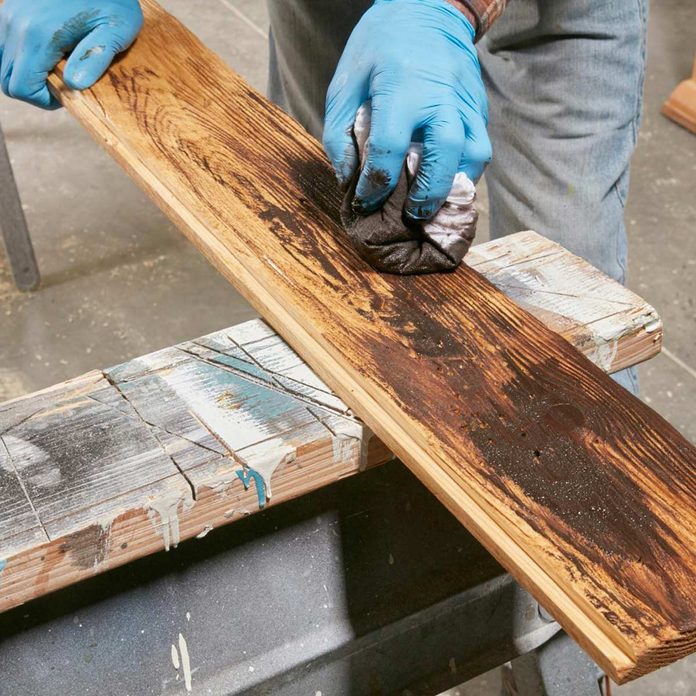
- Use a rag to apply an uneven coat of dark stain in a random pattern,
- Spread out the dabs of stain to create dark areas and streaks. Wipe off the excess with a different rag to expose some of the base coat color.
Step 11
Finish with Gray Stain
- Apply a thin, uneven layer of gray stain, dabbing and wiping to cap off the aged look. Don't forget to finish the ends and edges of the boards.
- Pro tip: It'll look better if the stain is less consistent. Also, don't worry if the finish is different from one board to another. The variation will add an authentic look when the door is assembled.
- Let the stain dry overnight before moving on to the door assembly.
Most stain brands have colors that will work well for aging wood. Here are the colors we used:
- Base coat: Varathane Summer Oak
- Second coat: Varathane Kona
- Third coat: Varathane Weathered Gray

Step 12
Square the Vertical Slats
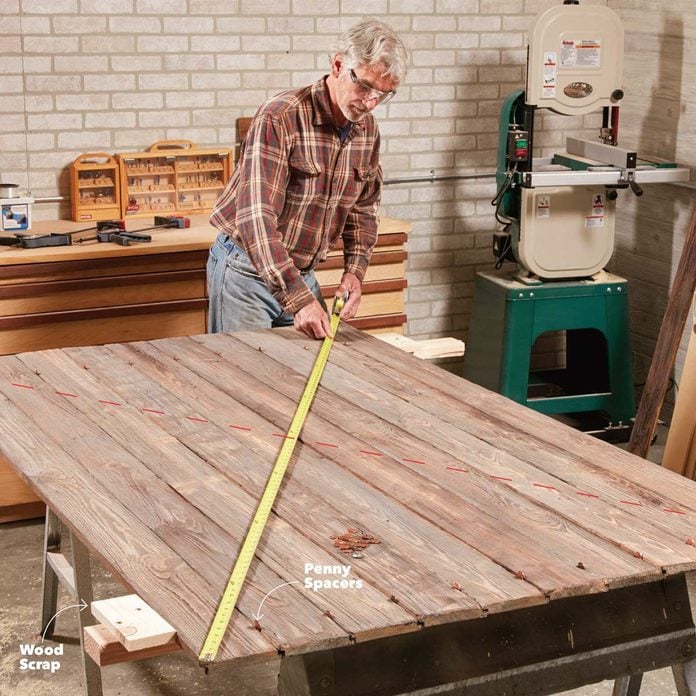
- Arrange the vertical boards on a pair of 2x4s placed flat on sawhorses or the floor, and arrange the 2x4s so they're lined up under the locations of the horizontal rails.
- Space the boards top and bottom with pennies.
- Screw scraps of wood to the 2x4s on both sides of the door to hold the boards together while you add the horizontal rail. After checking to see that the ends of the boards are still lined up, measure diagonally from opposite corners to make sure the door is square.
- Pro tip: If necessary, adjust the position of the boards until the diagonal measurements are equal.
Step 13
Fasten the Rails
- Mark the height of the rails on the door and attach them with construction adhesive and nails.
- Since the fasteners show, we decided to use 1-1/2-in. wrought-head nails. Because the nails protruded slightly from the opposite side, we shortened them a bit by holding them with locking pliers and grinding off the tips on a bench grinder.
- Pro tip: You could also mount a metal grinding wheel in your angle grinder.
- Drill pilot holes for the nails that are near the ends of the rails to avoid splitting the wood. If you don't mind the appearance of screw heads on the opposite side of the door, you could flip the door over and drive 1-1/4-in. screws through the boards into the rails for a little more strength.
- Pro tip: If you prefer, you could brush on a coat of flat polyurethane. Test the finish on a scrap to see if you like it before you apply it to your door. We didn't put a finish on our door.

Step 14
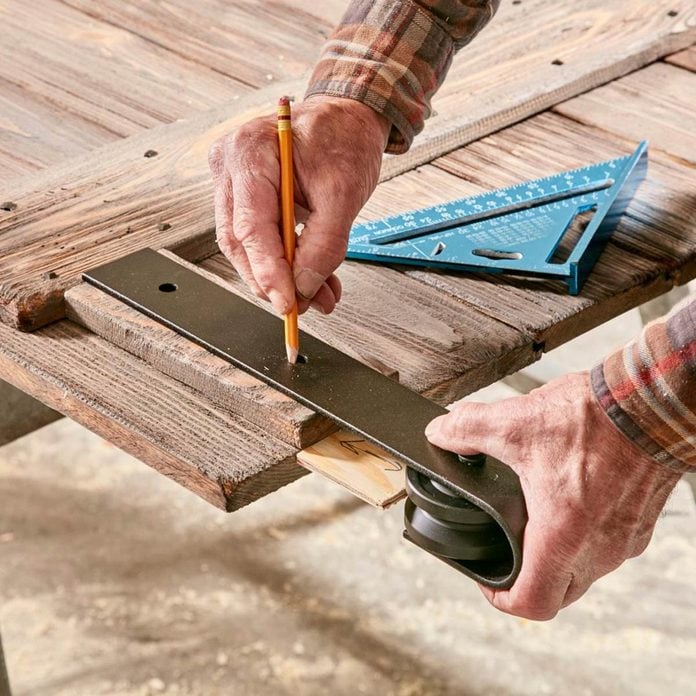
Mark for the Hanger Holes
- Follow the instructions included with your door hardware to install the hangers. After marking the bolt locations, drill holes for the bolts and mount the hangers on the door.
Step 15
Mount the Track
The steps you take to mount the track will depend on your track support. If you've installed continuous backing between the studs or are mounting the track on a header board, then you may be using a predrilled track and can proceed to bolt the track to the wall.
- If you're mounting the track over the drywall and bolting it to studs, you'll have to locate and mark the studs, then transfer the stud locations to the track so you can drill holes for the mounting screws in the right place. The instructions should give you a formula for determining the track height.
- Pro tip: Double-check your dimensions and math before mounting the track. You don't want to have to cut down the door or reposition the track if it's in the wrong spot.

Step 16
Hang the DIY Sliding Barn Door
With the track mounted, finish the job by putting the door on the track.
- Carefully roll it into each end to determine where to place the stops.
- Mount the end stops, bottom guides and any other hardware according to your specific set of instructions.

How to Build a Heavy Duty Barn Door
Source: https://www.familyhandyman.com/project/rustic-barn-door/
0 Response to "How to Build a Heavy Duty Barn Door"
Post a Comment